
- Nuvo Cabinet Paint Review & Guide - November 2, 2023
I recently purchased an older home, and between the upfront cost of that, renovations, and planning a wedding, my fiancé and I are trying to be prudent with both our time and our budget.
Having spent the last few months navigating the world of DIY home improvement, I’ve become more aware of which projects I want to prioritize financially, which will require more of my time, and which I would prefer to do quickly and inexpensively (but never shoddily!)
That’s why I was so intrigued by Nuvo Cabinet Paint—an efficient and cost-effective way to revamp cabinets in a weekend.
It almost seemed too good to be true, but I also knew that I wasn’t willing to spend too much time and energy on cabinets right now (I’ve got floors to sand and wedding cakes to taste), so I figured I’d give it a shot. Below, you’ll find my Nuvo Cabinet Paint Review and Guide.
Bottom Line Up Front
While I don’t expect the finish to last forever, I was very pleasantly surprised by Nuvo Cabinet Paint. It really was just as foolproof as they made it sound on the website.
The color I chose came out beautifully, and while it doesn’t look like I ordered a custom-colored cabinet, it looks much better than most hand-painted cabinets I’ve seen. My biggest complaints are that they include a cheap roller in the kit and don’t have as many color options as I would like.
Tips to Keep in Mind if You Are Planning to Paint Your Cabinets
- Cabinets take on a lot of wear and tear. Most paint is going to chip with regular use. I know people who have spent thousands of dollars extra for custom-colored cabinets done by a professional, and they still chipped in places. The goal is to get as much life as possible from your cabinets before they chip.
- If you decide to use a paint sprayer, make sure you order extra paint. You may even need twice as much paint as you would if you’re brushing/rolling on the paint.
- Any bare wood should be primed before you paint it, even if you’re using a paint and primer in one, like Nuvo. Trust me on this: you’ll save yourself time and money on extra coats of paint.
- This won’t be the last time I say this, but PREPARATION IS KEY. Take your time prepping before you move on to painting.
What is Nuvo Cabinet Paint?
Nuvo Cabinet Paint is a low-odor, low-VoC, water-based acrylic paint meant to make painting cabinets quick and easy. It can be used on wood, laminate, particle board/MDF cabinets, and on metal cabinets that have been primed or painted. It’s designed to be durable enough for cabinets in high-traffic areas that get regular use.
It doesn’t require a primer and needs very little prep work before you can start painting. The company claims that you can use it to repaint your kitchen cabinets in one weekend.
The paint is self-leveling, which means it smooths out brushstrokes and can be applied with a paintbrush or roller rather than sprayed like most professional cabinet paints. (Though you can absolutely use a paint sprayer if you want). This is definitely a product meant to make DIYing your cabinet paint as user-friendly and painless as possible.
Who Makes Nuvo Cabinet Paint?
I don’t want to say that I had trouble sourcing Nuvo Cabinet Paint, but I did run into some minor confusion. When I first searched for it online, I saw buying options from Amazon and a handful of big box stores and hardware stores, but it took me a minute to find the company’s website.
I saw Giani Granite listed as a retailer but assumed they were a granite specialist that also happened to sell the paint—my mistake! Giani makes Nuvo, along with their flagship product—an acrylic countertop paint meant to mimic the look of granite, slate, and other natural materials.
My Experience Using Nuvo Cabinet Paint
Ordering
As I mentioned earlier, it took me a minute to find the actual website for Nuvo, but that’s on me. I saw that the paint was available from several retailers and started by browsing the color options. I originally wanted to use the paint on my kitchen cabinets, which are in decent shape but chipped in places.
They’re a deep chocolate brown, which isn’t terrible but just isn’t really my style. I was hoping for a dark green or olive—I know green kitchens are almost too trendy at this point and possibly on their way out, but what can I say? I like what I like.
Nuvo Cabinet Paint Colors
Unfortunately, Nuvo doesn’t have a green option, at least not one like what I was looking for. The paint is currently available in 11 colors, listed below:
- Titanium Infusion: a bright, contemporary white
- Driftwood: a light, neutral gray
- Antique White: a warm, light cream
- Hearthstone: a soft, warm gray/beige
- Earl Grey: a cool charcoal gray
- Oxford Blue: a deep colonial blue/navy
- Olde Sage: a cool gray with green undertones
- Tidal Haze: a dusty, pale coastal blue
- Cocoa Couture: a rich chocolate brown
- Black Deco: an intense ultra-black
- Celadon Cove: a soft mint green
The available colors work for a range of classic and contemporary styles, but for the most part, they’re pretty safe and neutral. The two coastal colors are pretty, but they didn’t really fit my personal style (not to mention my 1930 brick row home).
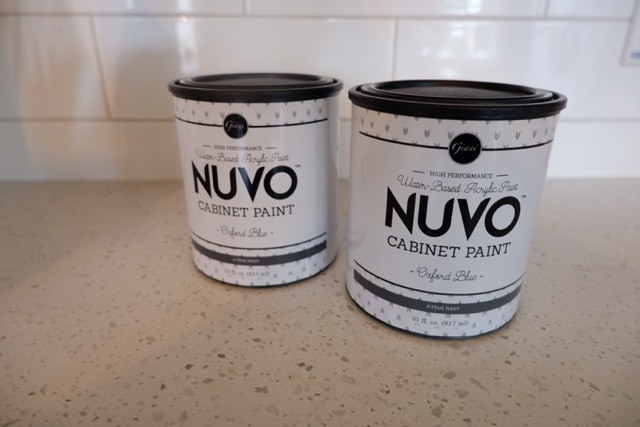
I narrowed it down to the Olde Sage and Oxford Blue before ultimately settling on the blue. The color is rich and bold, which aligns more with what I was looking for. I liked the sage, but it was considerably more gray than green and not what I wanted.
Where to Buy Nuvo Cabinet Paint and Prices
Before ordering my paint, I hoped to find a sample or at least look at some paint chips in person since I know that my computer screen can be unreliable when it comes to true colors. I couldn’t find any samples online, but I noticed that the paint was sold at Home Depot, so I headed to my local store.
When I couldn’t find Nuvo in the store, I asked an associate and was told that it’s an online-only product. I searched a few other specialty stores and didn’t have any luck there either—oh well. It seemed like a good idea at the time.
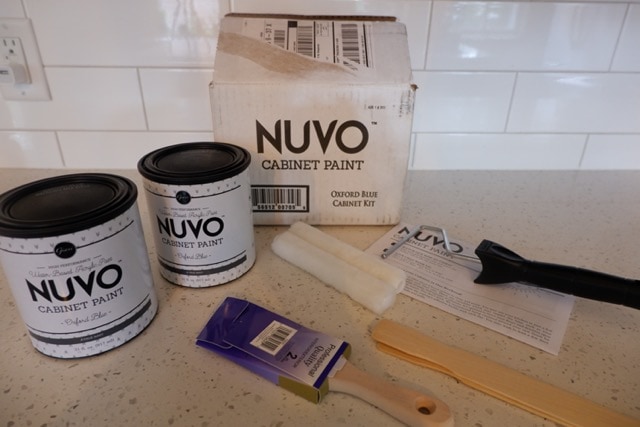
I ended up just pulling the trigger and ordering the Oxford Blue Cabinet Paint Kit for the Giani Granite website. I found it available at other retailers for a few dollars less, but I figured if I ordered directly from the site, I wouldn’t risk an older formula that had been sitting around for several years. (Note that I didn’t find any evidence that they have updated their cabinet formula, but the company did recently revamp their countertop paint formula, so I figured I’d rather play it safe).
The paint is sold in individual quarts or in kits, which contain two quarts of paint, a small roller, a brush, and an instruction booklet. One kit covers about 100 square feet of cabinets (approximately 40 linear feet), which is enough to paint an average kitchen, according to their website.
I found Nuvo for the following prices online, though they may change depending on when/where you order the paint:
| Retailer | Kit Price | Quart Price | Notes |
| Giani Granite | $79.95 | $36.95 | Free shipping, received it in about four business days |
| Amazon | $70.87-$79.95
(Depending on color) | $36.95 | Free shipping, could get it the next day with Prime |
| Home Depot | $89.95 | n/a | Free shipping, could get it shipped to my local store or my home in about three business days |
Brief Detour: My Decision-Making Crisis
I ended up throwing myself a curveball during this process. In the time between ordering my paint and receiving it, I had a change of heart—if I’m being honest, I kind of chickened out. I decided that my kitchen cabinets weren’t quite chipped enough to warrant repainting yet.
Honestly, I was worried that I was just going to accelerate the wear on them by painting them and possibly setting them up to chip even more over the next few years. It was a risk I wasn’t quite ready to take.
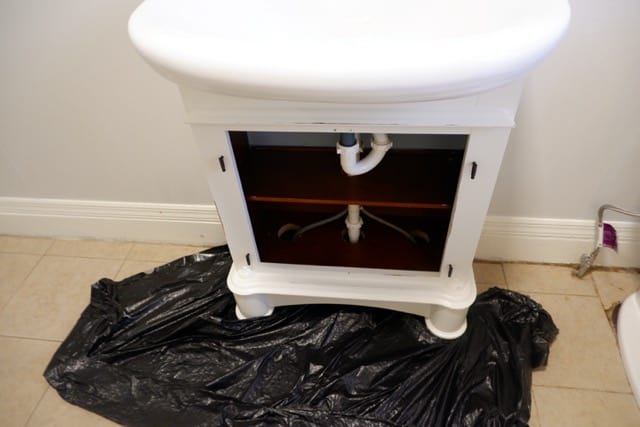
Luckily, I had another solution, and my paint wasn’t about to go to waste. Currently, my least favorite room in our house is the second-story bathroom. It’s dingy and ugly, with chipped tile and an awkward flow.
Our plan is to eventually tear it down to the studs and move the shower so that it feels less cramped, but we have a lot of other projects in the works right now and don’t have the time or budget to tackle this just yet.
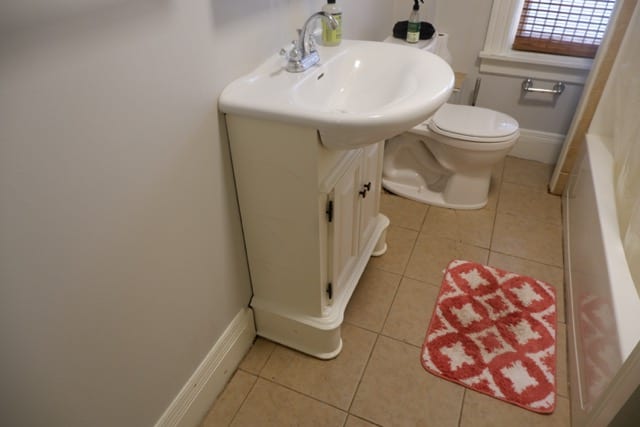

That being said, I have some family members coming to stay with us in a few months, and I’d like to make the bathroom a little less embarrassing before then. I have to do it relatively quickly and inexpensively since I don’t want to drop a ton of money on a bathroom I plan on ripping out, and I’m busy with my other projects.
This seemed like the perfect use for my incoming cabinet paint—and the color was a perfect complement to the gold mirror I had already impulse bought!
Unboxing
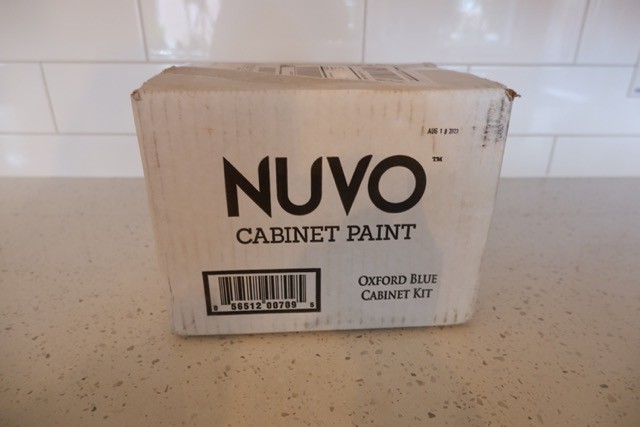
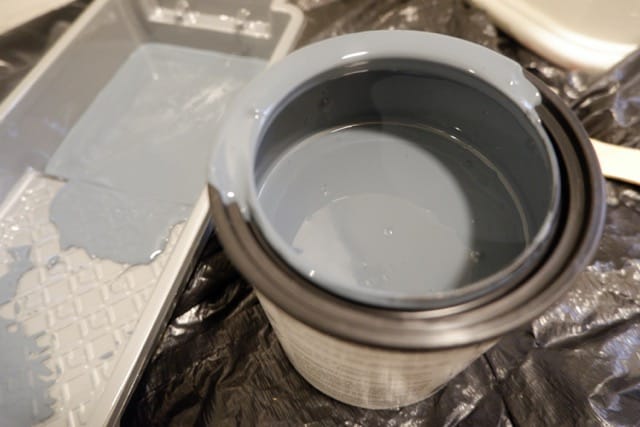
My cabinet paint arrived less than a week after I ordered it. It came in a compact cardboard box with the color name printed on the outside.
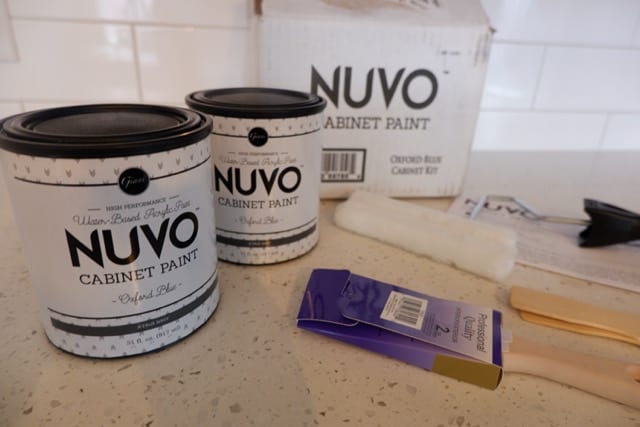
Inside the box were two “quarts” of paint (they’re actually 31 oz each, so just under a quart), a 6” roller with two roller heads, an angled brush, two paint stirrers, and instructions for painting.
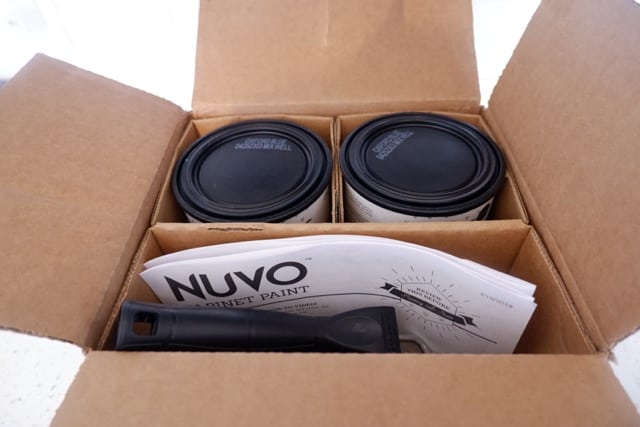
I was very impressed by the instructions. They were easy to follow and included information on how to clean and prep your cabinets—including offering insight into why cleaning and prep are so important when painting.
They even made suggestions for what order to paint the parts of your cabinets in, what direction to paint in, and reminders about watching for drips. Even if you have no experience painting, these instructions make it easy to know exactly how to tackle this project. (You can also find the instructions online, along with an instructional video).
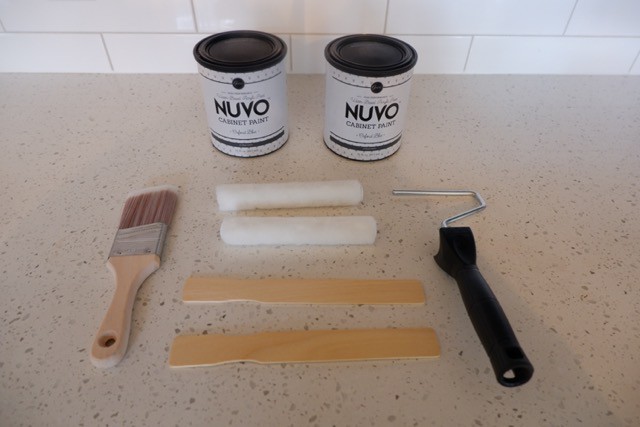
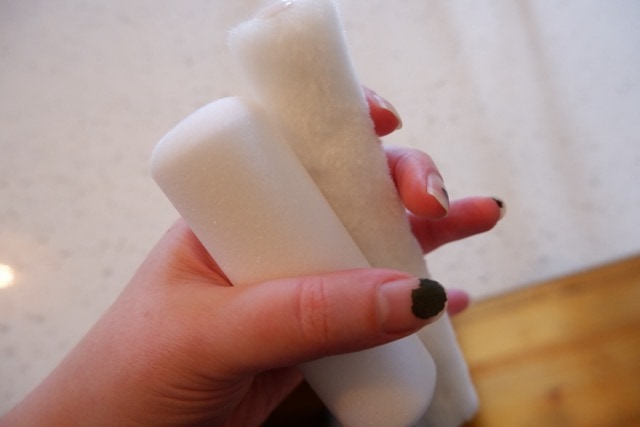
The one thing I wasn’t super impressed with was the roller. Not only is there no paint tray included in the kit (they do list this as something you’ll need to provide, but it seems like they could have just as easily thrown one in), but the rollers were also a bit longer than I would have liked, and the roller heads were shedding some lint.
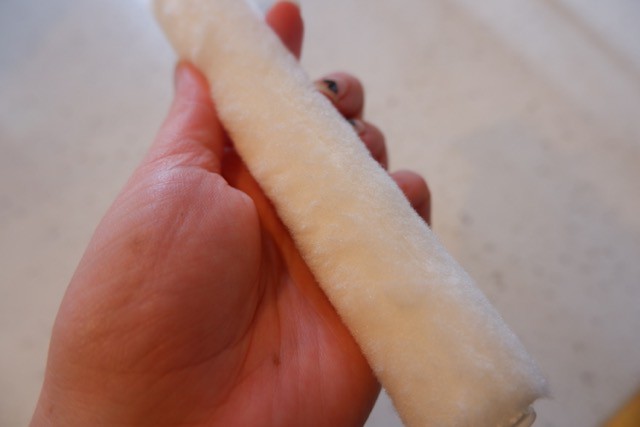
Since I had to purchase a paint tray anyway, I ordered this one on Amazon, which also comes with a 4” foam roller. I prefer foam rollers for projects like this because they don’t leave lint. I also thought the 4” length would be easy to maneuver when painting a cabinet.
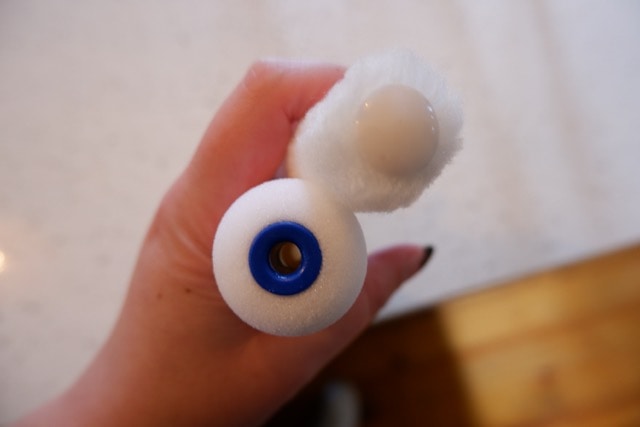
The angled brush that was included in the kit looked ok and didn’t seem to be shedding bristles, but I had another angled brush on hand just in case (I like this one) that I did end up using as well.
What You’ll Need That Isn’t Included in the Box
- Degreaser and/or Windex for cleaning the cabinets
- Wood filler (if you have deep nicks or gouges in your cabinets that you want to fill)
- A screwdriver to remove cabinet hardware
- #300 grit sandpaper(and liquid deglosser if you have glossy cabinets)
- Painter’s tape
- Drop cloths or plastic tarps to protect your floors and countertops from drips
- A paint roller tray
- A small paintbrush for any tight spots
- If you want to switch to new cabinet hardware, now is the best time to do it
- I also recommend grabbing a foam roller and a quality angled brush (see above)
Prepping to Paint
Just because you don’t need to prime doesn’t mean you don’t need to prep. In fact, Nuvo’s instructions offered a detailed explanation of how and why you need to prep your cabinets before you begin painting.
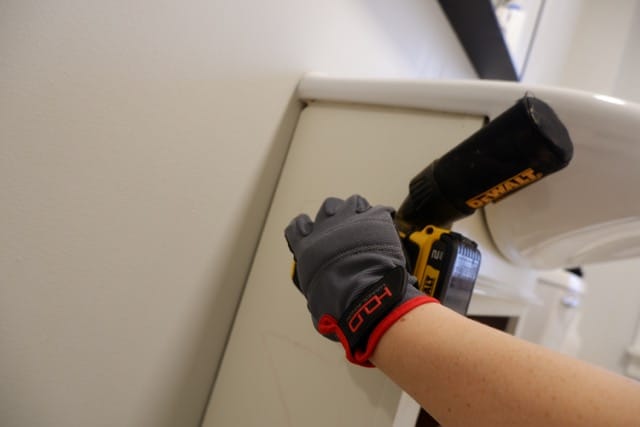
Step One: Clean and Remove Doors and Drawers

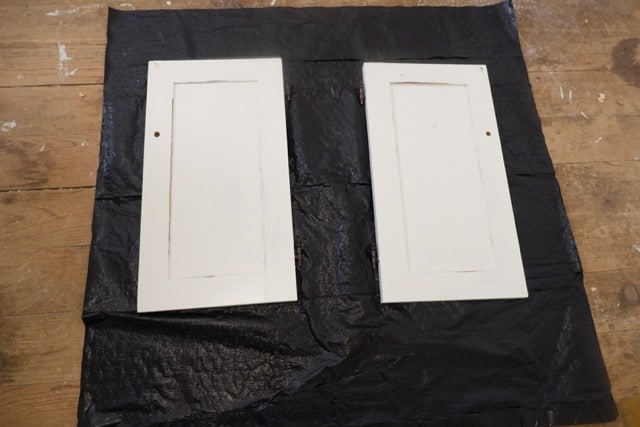
The first thing I did was clean up the area and remove any dust and dirt from my vanity cabinet. I removed the doors from my cabinet, but it is entirely possible to paint the cabinets with the doors still attached—just make sure you keep them open until they’re fully dry (at least eight hours).
The same goes for the drawers. If you’re painting a full kitchen and removing everything, I HIGHLY recommend labeling each door and drawer as you remove it so that you remember how to reassemble your kitchen. It will save you a massive headache down the line.
Step Two: Remove Cabinet Hardware and Wood Filler
Next, I removed my cabinet knobs. The hinges were old and cheap, and I didn’t want to break them, so I decided to just tape over them. If you’re planning on replacing your cabinet hardware, the best time to do it is when you’re painting your cabinets.
If your new hardware is a different size or type than the existing hardware, take the time now to fill in any holes with wood filler and drill new ones before painting. If you’ve got a lot of cabinets to cover, consider buying a cabinet hardware jig to make positioning everything easier. Use your wood filler to fill in any deep scratches at this point, too.
Step Three: Sanding
Sanding is key and probably the most important step of this whole process if you want your cabinets to look professionally finished. If you don’t sand down the existing finish on your cabinets, there’s a good chance your paint will peel right off. Definitely don’t skip this step or cut corners here.
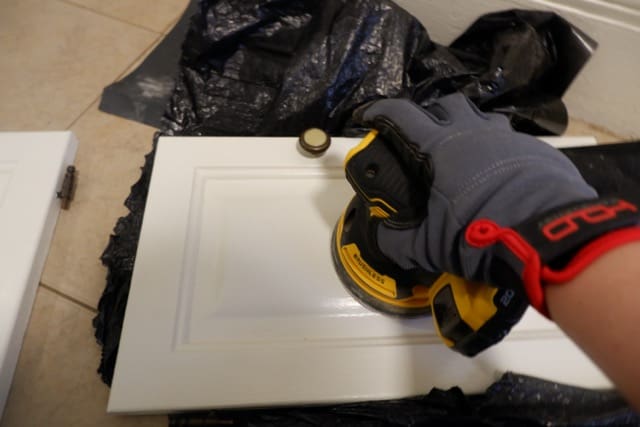
I used an orbital palm sander for the flat surfaces on my vanity, just because I happened to have one close by, but you can definitely sand your cabinets entirely by hand. (If you’re sanding wood cabinets, it’s better to sand with the grain and not in a circular motion). I used sandpaper sheets to get into any crevices and valleys. If you have high-gloss cabinets, use a liquid deglosser on them before you sand them to save yourself some time and energy.
Step Four: Cleaning (Again)
Next, you’re going to need to clean your cabinets again to wipe away any sawdust and paint chips you might have kicked up and make sure your cabinets are truly free of grime. Nuvo recommends using a degreaser, especially in areas that you touch often, like around the handles. They also recommend Windex as an effective cleaner that won’t leave any residue. I used both.
Step Five: Tape
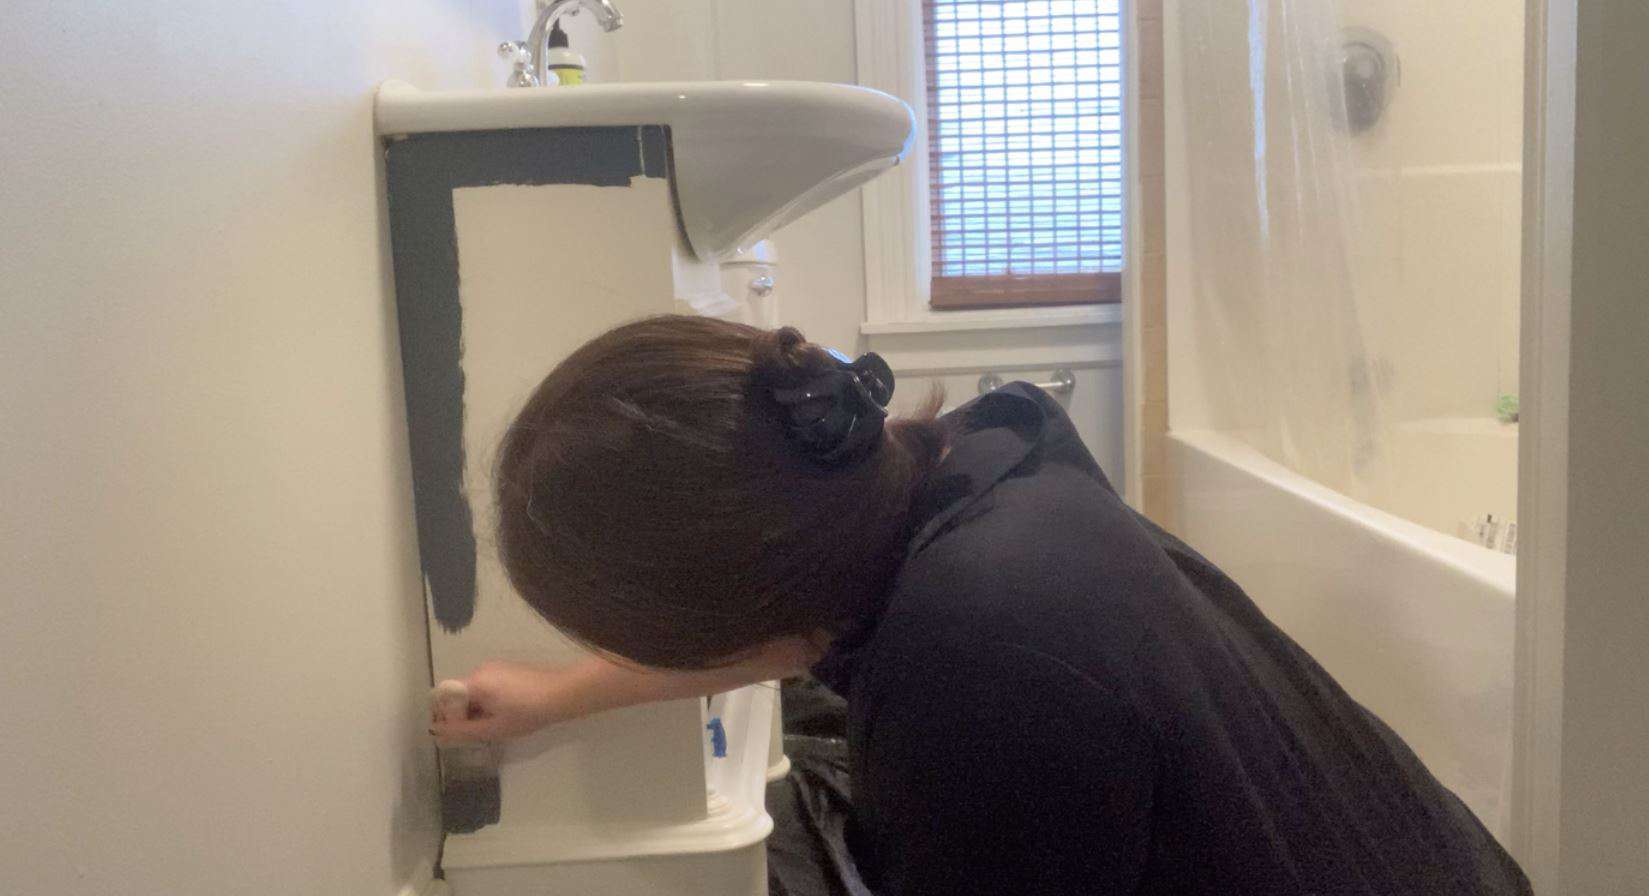
Tape off any hinges or hardware that you didn’t remove. Don’t try to paint your hinges. The paint will 100% chip (and we’re not looking for the landlord special here).
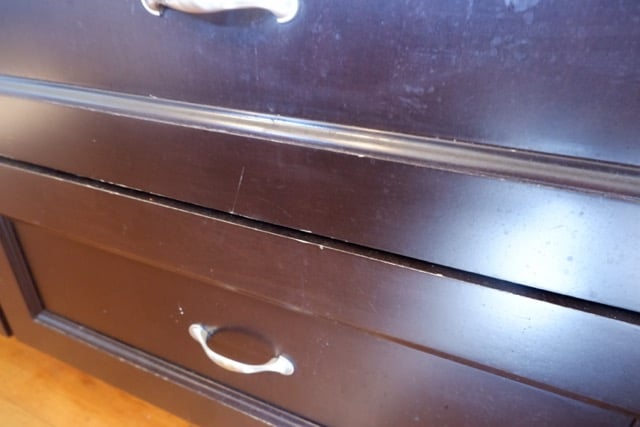
Tape the walls and any appliances that butt up against your cabinets. Lay drop cloths on the floor and countertops. Note: I did none of this. I like to throw caution to the wind, but you’ll make your life so much easier while painting if you just take the time to do it. Learn from my mistakes. There’s still a bit of paint on the wall behind my vanity that I’m having trouble removing.
Painting
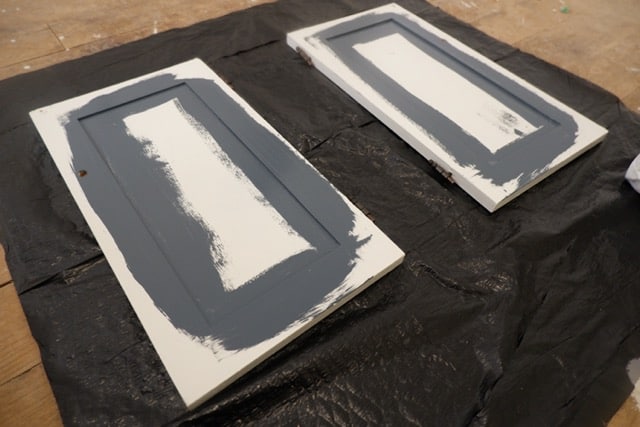
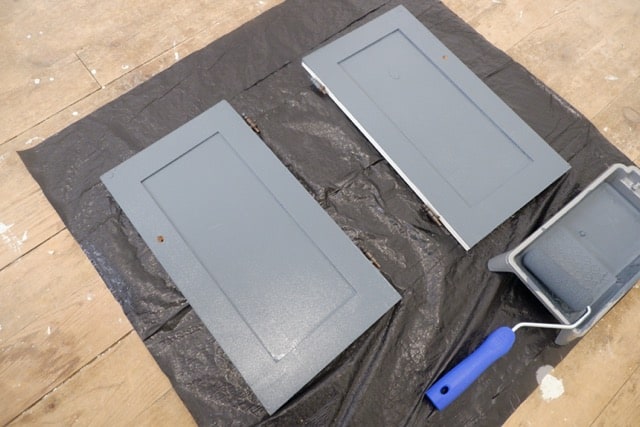
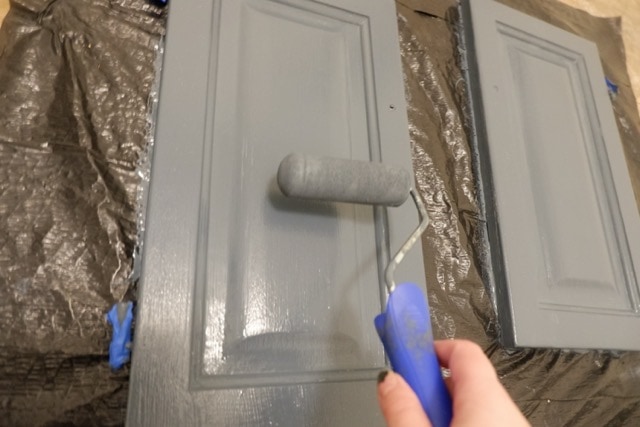
One of my biggest tips for painting cabinets is to build up several thin layers rather than trying to get full coverage with your first coat. You’ll end up with a much more professional-looking finish and way fewer drips to contend with. Make sure you mix your paint thoroughly before you start painting. This paint is pretty thick, so mix it extra well!
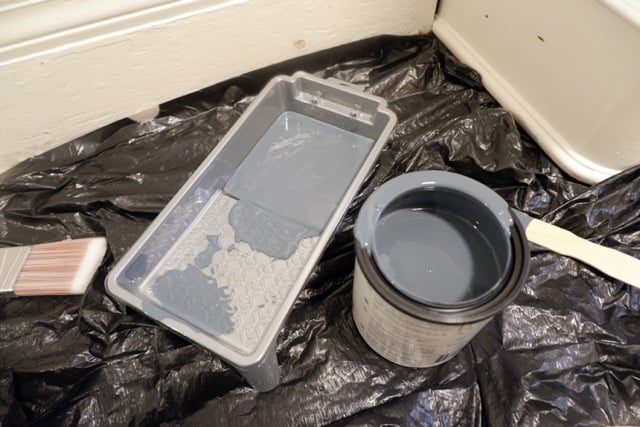
I was impressed with the Nuvo Cabinet Paint’s coverage, even with just one initial coat. The paint glided on beautifully, and the color was exactly as I expected it to be. The paint was a bit more viscous and sticky than standard interior paint, which made it feel a bit messier to work with, but as long as you work slowly and carefully, you shouldn’t have a problem.

You’re going to want to paint your cabinet frames and boxes first, then move on to your doors and drawers. If you have shaker cabinets or doors with raised panels, paint the “valleys” first.
Paint at least two coats, allowing your paint to dry completely in between (at least two hours).
I did notice when I was painting that if I painted a coat on too thickly, my brush would just sort of move the paint around, and I’d end up with visible streaks. Though, by the time I got through the second coat, pretty much all of the streaks had disappeared. The paint roller left a much subtler texture than the brush but wasn’t a great option for maneuvering into narrow spaces.
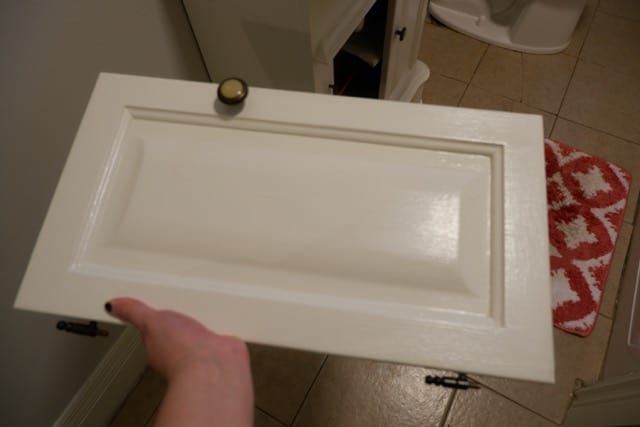
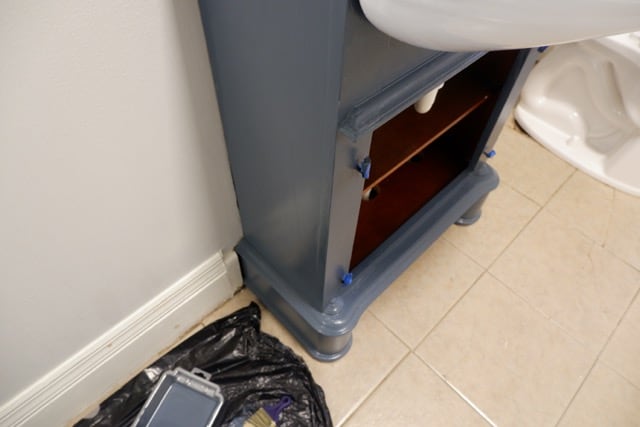
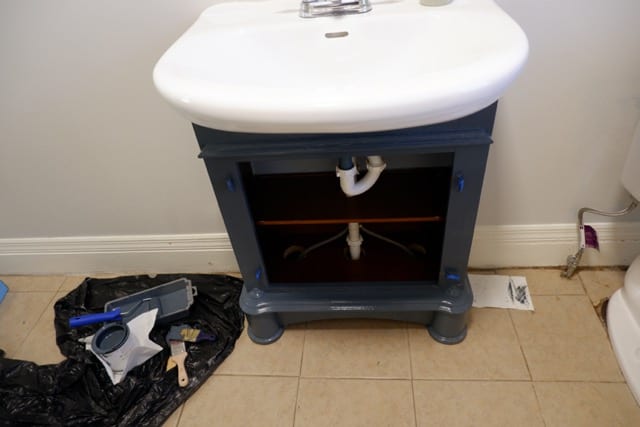
Results and Durability
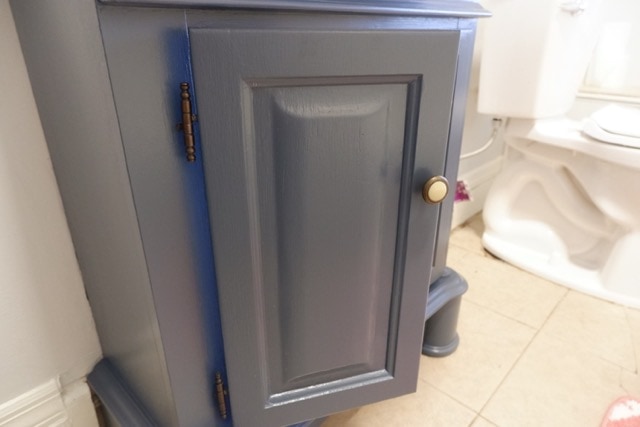
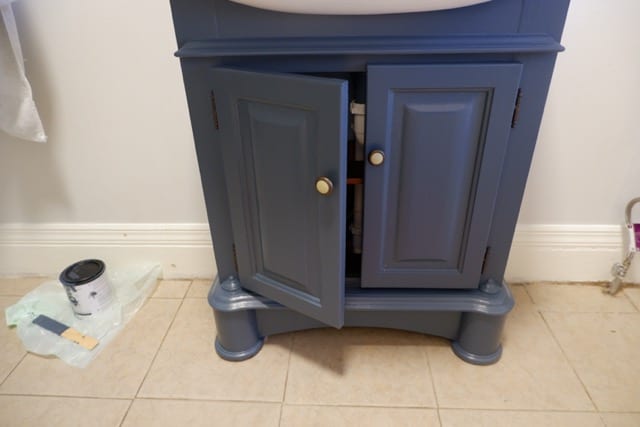
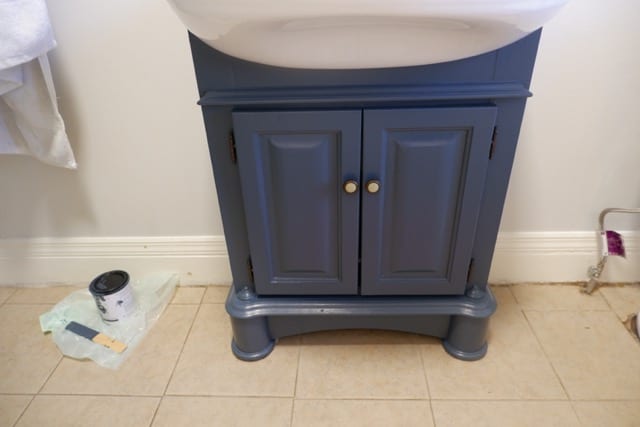
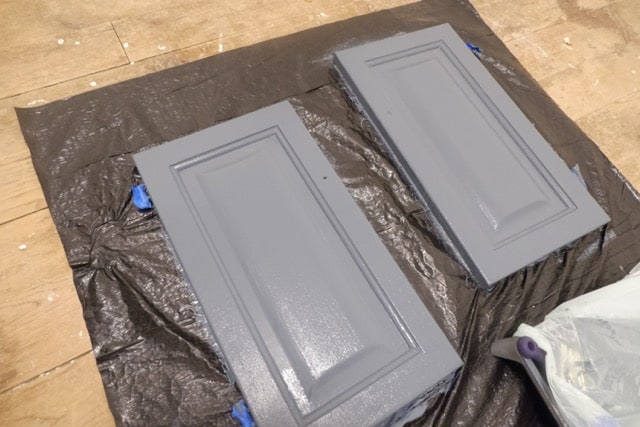
When the paint dried, the color was very true to what I saw online. I only tested the one color and can’t speak for the others, but all of the subtle qualities that I liked in the Oxford Blue’s undertones were present. I was worried it might come out too “arts and crafts” looking, but it’s a gorgeous, sophisticated color.

The paint had a slightly satin finish, and while I could definitely see some brush strokes and texture, overall, I was pleased with the finish—though it would have been even better if I had spent more time sanding.
There were a few places here and there that I needed to touch up. I had a feeling this was going to be the case when I finished putting on the second coat, but they were pretty subtle, and I was honestly too busy with other projects to care too much.
I might just go in with a touch-up brush and paint them out. I didn’t paint on any sort of top coat since the instructions said it wouldn’t be necessary, but I would imagine you could use one to increase the life of your paint job.
Altogether, it took me less than a day to paint my one bathroom vanity cabinet, and most of that time was spent waiting for paint to dry in between coats. I think you could absolutely repaint your kitchen cabinets on a weekend with this kit, but I would recommend doing as much prep work as possible on Friday night so that you don’t feel rushed and end up getting sloppy with your painting by the end of the weekend. It’s not a particularly difficult project, but it’s definitely one that benefits from some patience.
After about a week of shower humidity and opening and closing the cabinet doors quite a bit, I haven’t noticed any wear or peeling so far. Everything is looking great, and as an added bonus, the satin finish makes the cabinet super easy to wipe clean.
So…Would I Use Nuvo Cabinet Paint on My Kitchen Cabinets After All?
Honestly? I probably would! But not for a few years. (Nuvo, if you ever decide to make the green paint of my dreams, call me!) I do think that the paint will inevitably chip in high-traffic areas, so I would wait to use this until my cabinets were beat up enough that a little chipped paint would still qualify as an improvement. Another option would be to just resign yourself to repainting every few years if need be.
If I used this in my kitchen, I would also probably spend at least a full day cleaning, sanding, and taping everything off to make the painting process as smooth and easy as possible. I might even consider renting a paint sprayer to get an even more professional finish.
Pros and Cons
Pros
- The instructions were very detailed but easy to follow, even for beginners.
- I love the color of the Oxford Blue paint!
- The kit was inexpensive.
- You don’t need to use a primer or top coat.
- They include most of the supplies you’ll need in the kit.
- You can repaint your kitchen in about a weekend.
- So far, my cabinets have held up nicely. The finish is durable and wipes clean.
- There was no noticeable odor, even in a tiny cramped bathroom.
Cons
- I wish they had more color options.
- You can’t order samples or even swatches of the paint anywhere.
- I couldn’t find anyone that carried it in stores.
- The paint is very thick and viscous, which made it messy to work with.
- While the finish was smooth, I can still see brushstrokes in it.
Alternatives to Nuvo Cabinet Paint
Rust-Oleum Cabinet Transformations
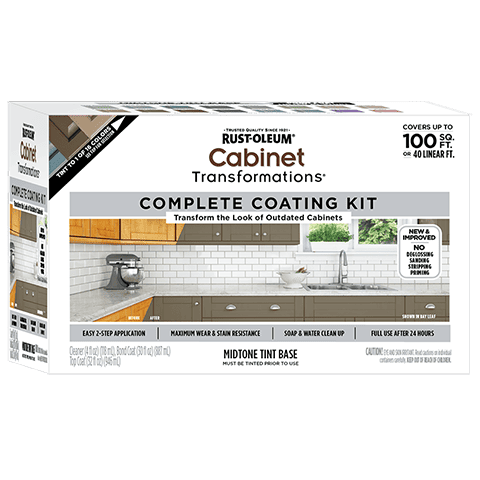
Rust-Oleum makes a similar cabinet painting kit that includes everything you need to repaint a full kitchen’s worth of cabinets. Rustoleum’s kits are broken into light tone, mid tone, and deep tone, and each comes in over a dozen color choices or can be tinted in the color of your choice at a paint counter.
Unlike Nuvo, Rust-Oleum claims you don’t need to sand before applying their paint. They also include a degreaser in the kit, which I thought was a nice touch. I found the kit for a few dollars cheaper than Nuvo’s.
Valspar Cabinet & Furniture
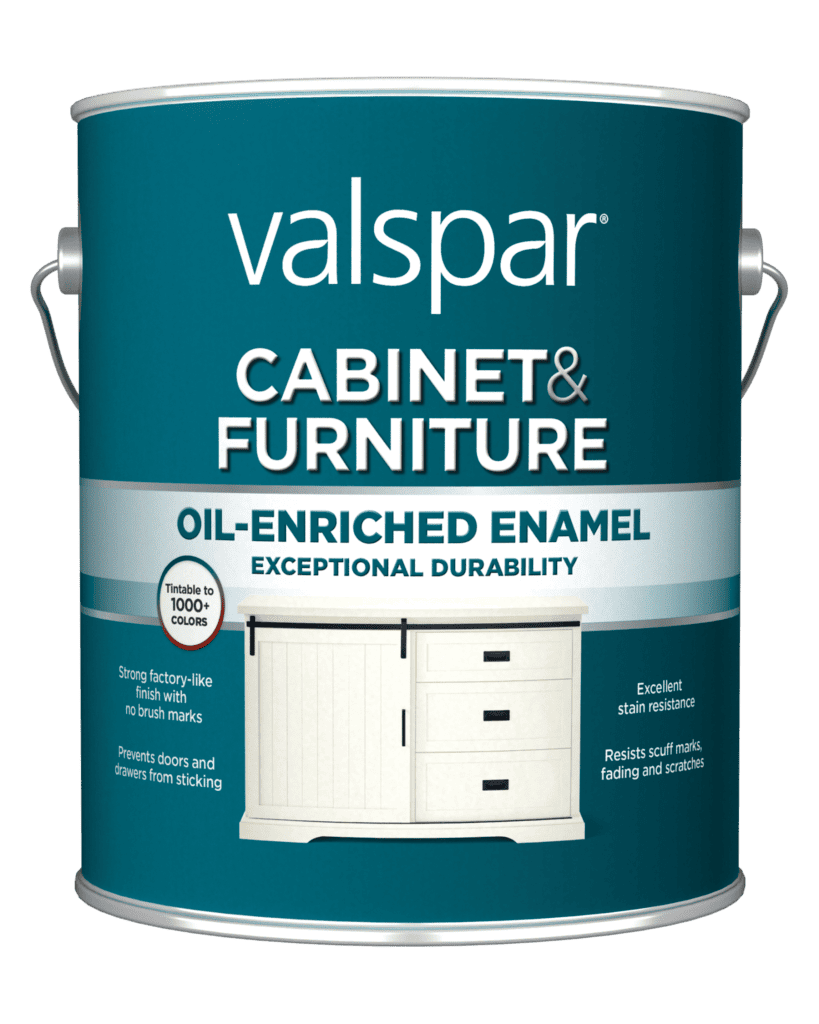
Valspar doesn’t sell cabinet kits the way Rust-Oleum and Nuvo do, but they do make a full-coverage, low-prep cabinet paint. Depending on your existing cabinets, you may or may not need to sand or prime. The paint comes in a flat, satin, or semi-gloss finish.
You can have the paint tinted any color you want at a paint counter (Lowes and Ace Hardware both carry Valspar paint), and they have several color options online. A pint of Valspar cabinet paint is about $6 to $8 cheaper than a pint of Nuvo. You can read our full Valspar Cabinet & Furniture Paint review here.
FAQs
Answer: It should only take about two or three coats of Nuvo Cabinet Paint to fully cover your cabinets. If you’re painting a light color (particularly the Titanium White) over dark cabinets or a dark color over light cabinets, you may need an extra coat or two.
Answer: If your painted cabinets are peeling, it’s most likely because they weren’t properly prepared before you started painting. Always make sure your cabinets are sanded and cleaned (and primed when necessary) before painting.
Answer: Cabinet paint is specifically formulated to be durable and resist scratching, even more so than regular interior paint. It’s also designed to adhere to surfaces like wood or laminate without chipping and finishes with a smooth surface.
Final Thoughts
Despite my initial panic, I’m very satisfied with Nuvo Cabinet Paint and the way this project turned out. The color and finish are exactly what I was hoping for, and although it’s not completely brushstroke-free, it looks pretty great. I was very impressed by how quick and easy this kit was to use, and I hope to see more color options from them in the future!